18th December 2015 by aegeuana_sjp_admin
How to Deploy a Qt QML application on Mac [part 2]
After we create our ‘.app’ folder and link it to all the necessary libraries we are good to go for the installer and other features which will make our application look more professional.
Before we create the installer we need to include additional information about our program. We can do this as follows:
1. Modifying the ‘Info.plist’ file.
On Mac OS X all application initial settings, like the displayed icon or the associated file type etc. are stored in the ‘Info.plist’ file inside the ‘.app’ package.
The ‘Info.plist’ file is simply an XML file with information about the given app. To find and edit your ‘Info.plist’ file you need to left click on the ‘.app’ package and choose the ‘Show Package Contents’ option, then navigate to the ‘Contents’ folder.
If you generated the ‘.app’ package by macdeployqt your initial settings for ‘Info.plist’ should contains the basic information about the application.
[code language=”xml”]
<?xml version="1.0" encoding="UTF-8"?>
<!DOCTYPE plist PUBLIC "-//Apple//DTD PLIST 1.0//EN" "http://www.apple.com/DTDs/PropertyList-1.0.dtd">
<plist version="1.0">
<dict>
<key>NSPrincipalClass</key>
<string>NSApplication</string>
<key>CFBundleIconFile</key>
<string></string>
<key>CFBundlePackageType</key>
<string>APPL</string>
<key>CFBundleGetInfoString</key>
<string>Created by Qt/QMake</string>
<key>CFBundleSignature</key>
<string>????</string>
<key>CFBundleExecutable</key>
<string>TestApp</string>
<key>CFBundleIdentifier</key>
<string>com.yourcompany.TestApp</string>
<key>NOTE</key>
<string>This file was generated by Qt/QMake.</string>
</dict>
</plist>
[/code]
We can now already change some of the settings:
1.1 Associate your company with the application(create company namespace).
To associate our application with our company we should modify ‘CFBundleIdentifier’ key. The key ‘CFBundleIdentifier’ is the unique identifier for our application and we can change it to present our company as follows:
[code language=”xml”]
<key>CFBundleIdentifier</key>
<string>com.aeguana.TestApp</string>
[/code]
1.2 Associate an icon to your application.
If you want to add an application icon you need to modify the ‘CFBundleIconFile’ key. The key ‘CFBundleIconFile’ shows the system how your icon file is named. On Mac OS X you need to create a special icon ‘.icns’ file. You can do this by using ‘makeicns’ and pass into it the images you want to create the ‘.icns’ file from. For example to create ‘image.icns’ you can execute:
[code language=”bash”]
$ makeicns -in myfile.jpg -out image.icns
[/code]
Copy the output file ‘image.icns’ into the ‘Contents/Resources’ directory inside your ‘.app’ package. Now you can change the ‘CFBundleIconFile’ key to the name of the ‘.icns’ file you have just created:
[code language=”xml”]
<key>CFBundleIconFile</key>
<string>image.icns</string>
[/code]
1.3 Bind the file type (file extension) to your application.
To do this you need to add the new key into the ‘Info.plist’ file, the ‘CFBundleDocumentTypes’ key. Append the code below into the ” element inside the ‘Info.plist’. All the keys/value are fairly self explanatory:
[code language=”xml”]
<key>CFBundleDocumentTypes</key>
<array>
<dict>
<key>CFBundleTypeName</key>
<string>YourFileType</string>
<key>CFBundleTypeExtensions</key>
<array>
<string>yourextension</string>
</array>
<key>CFBundleTypeIconFile</key>
<string>image.icns</string>
<key>CFBundleTypeRole</key>
<string>Viewer</string>
<key>LSTypeIsPackage</key>
<false />
<key>NSPersistentStoreTypeKey</key>
<string>Binary</string>
</dict>
</array>
[/code]
1.4. Other options.
There are a lot of other options to extend your application functionality. You can check all of the available keys on the ‘.plist’ documentation site.
2. Creating the installer
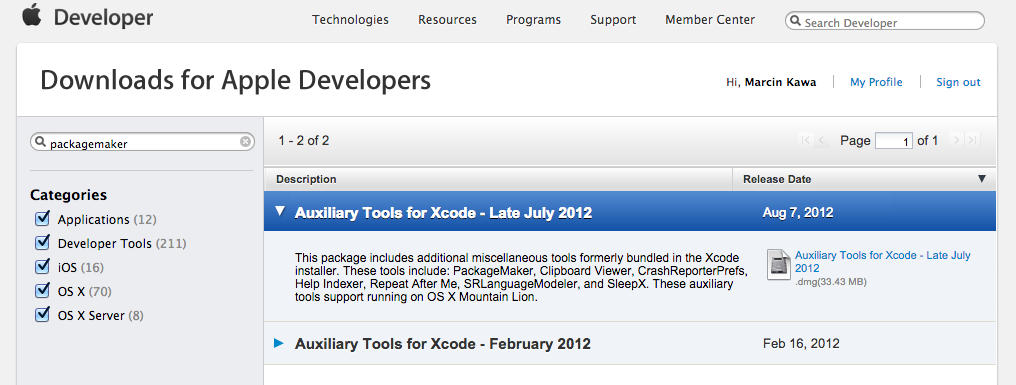
The fastest way of creating the proper installer for Mac OS X is to use ‘PackageMaker’. You can download it from the Mac developer site. It is part of the ‘Auxiliary Tools for Xcode’.
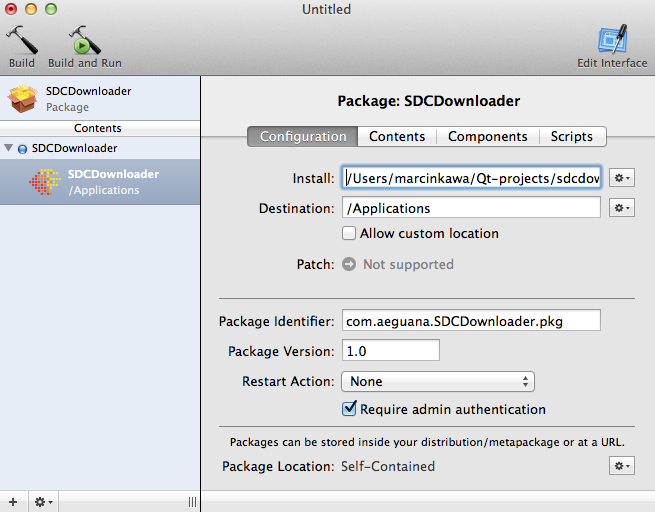
You can drag and drop your previously created ‘.app’ package into the ‘Contents’ area in the ‘PackageMaker’. You can then modify the steps of the installation process and add your license terms and conditions, or change the installer background. After all the changes are complete, click the ‘Build’ button and the ‘.pkg’ file will be created. For the full documentation of ‘PackageMaker’ go to PackageMaker documentation which contains detailed step by step instructions on how to use it.
Now your application is ready to go live!