3rd May 2017 by Pambos Palas
Motorised Blinds
Although sunshine is considered to be a relatively rare commodity in London, and is almost always welcomed, it has also been the source of a long-standing frustration.
Being a light sleeper, I have often struggled with the amount of light entering the room. It has been a problem with no seemingly easy solution: having thin blinds means that light still comes in when you are trying to sleep, and having blackout blinds means that you are doomed to waking up in a pitch black room without a sense of time and space (few things are worse than that!).
Fortunately, with the advent of the Internet-of-Things and the huge selection of smart home devices available, there is a solution for almost every problem. Not only can you have a smart thermostat to manage your heating, or an automated dog feeder to keep your pet alive (when you clearly don’t have enough time in your life to own a pet!), we are now only one step away from Iron Man and his artificial assistant Jarvis. Granted, we have a different name for Jarvis, but in principle we can mumble something like “Alexa, open the blinds!” and like magic our wish is granted.
That was the dream anyway. Making it a reality was an interesting journey that I thought I might share here for anyone else that might be pursuing a similar solution.
I knew that motorised blinds are available, and have been for some time, but I wanted something that is consistent with what I already have in place in my home. Currently, there is an overwhelming choice of brands offering smart home devices, and there are clear benefits to having devices that can work together – you can have a single app for controlling the whole house, and you can have a single button that can simultaneously turn off the lights and lower the blinds for example. For me it was an easy choice from the beginning – I kitted out my house with LightwaveRF devices. Not only are their devices very sleek, but they have been very reliable and they have a great choice of products that covers just about everything you need. Also… Alexa compatible! In this case, LightwaveRF don’t offer motorised blinds, but they do have what is known as an “In-line Relay”, which is essentially a switch with three states: OPEN, CLOSE, OFF.
“Perfect!” I thought. All I need now is a motorised blind that works with these signals and I can integrate this in no time. I would be lying if I said I couldn’t find anything, but I did uncover a horrible truth: motorised blinds are very very expensive! If you do have a healthy budget and want to avoid the hassle, have a look for the “Somfy” motor which is pretty much plug and play with LightwaveRF.
Being on a modest budget, I had to seek alternative solutions. I considered building the blinds from the ground up, but that seemed like too much work, so I landed on the idea of ordering a set from the far east (prices were about a quarter of what you would find on the high street). Of course, the blinds came with a simple motor, and a proprietary RF remote for controlling them. The following section covers how I simplified the process and linked them to my LightwaveRF app.
Installation
Installing the blinds was quite easy – when ordering them (see link below), you specify the dimensions of the window you are trying to cover, and they come customised with a necessary margin for mounting. You can order blinds that work with batteries (6 month life on average), with a solar panel charger, or mains powered. I opted for the latter, and wired them in.
As a first step, I needed a method of controlling them. They each came with a proprietary remote control that would send the command for the blinds to start opening, closing or stop any existing motion. The two choices were to either detect/sniff the RF signal and frequency being emitted in each case and replicate it on demand, or to actually integrate the remotes themselves in the control system – which seemed a little easier.
So the plan was to use relays (electro-mechanical switches) to virtually “press” the desired button on the remote and effectively activate the required RF command. An arduino would be used to receive the signal from the LightwaveRF relay and manage the remotes.
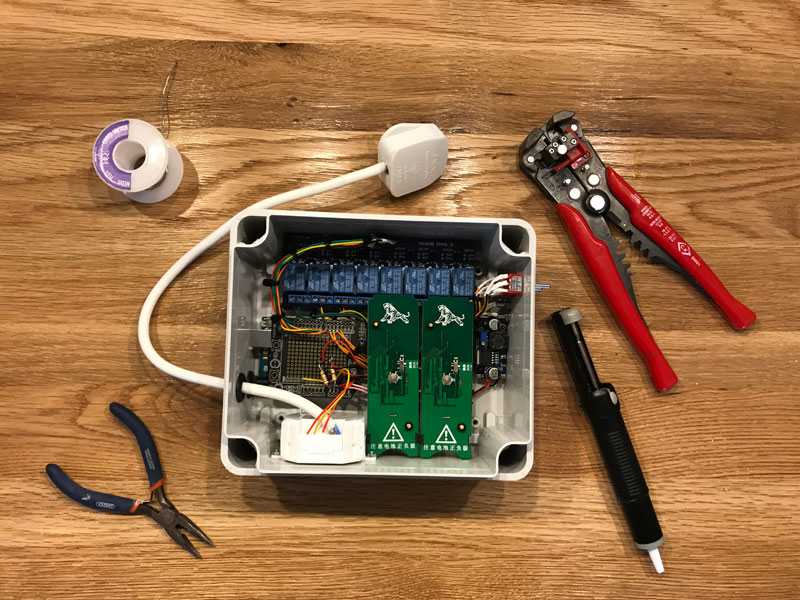
The following items were used:
- 2 x Motorised Blinds
- 1 x Enclosure (to house the control system)
- 1 x Arduino UNO (to act as the main processor controlling the workflow)
- 1 x 7-12V power supply for Arduino
- 1 x Relay board (to “press” the buttons on the remote)
- 1 x 5V to 3V converter (to remove the need for batteries on the remote)
- 1 x LightwaveRF Inline relay
- 2 x Blind RF remotes (these came with the blinds)
- Miscellaneous cable
- Standoffs
STEP 1
Disassemble RF remotes to see what connections need to be made. Luckily the circuit was very basic, and it was fairly easy to see what needs to go where.
NOTE: Before taking it apart, it helps to pair it with the blinds if that is required (see manufacturer’s instructions).
In my case, I needed several connections per remote:
- I decided to hard wire the voltage supply so that I wouldn’t need to replace the batteries. The input voltage that the CR2032 batteries provide is 3V and so a DC to DC converter was required to convert the Arduino’s 5V to this level.
- A relay was needed to close the circuit for each button that you need to control (OPEN, CLOSE, STOP).
STEP 2
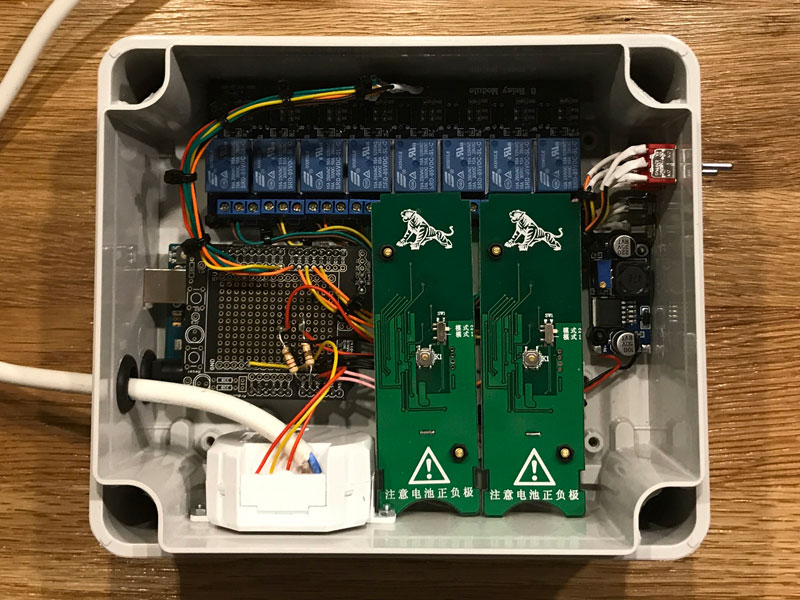
Decide on the layout and mount all components inside the control box. The following connections were necessary, so the layout can be designed accordingly:
Arduino -> Relay board -> RF Remotes
Arduino -> 5V to 3V DC-DC converter -> RF Remotes
Lightwave RF Inline Relay -> Arduino
The image below shows the layout I used (note: I used additional switches for a manual override).
STEP 3
Connect all the components together electrically. I am including my configuration here as this is followed by the software I am providing, but this can be configured in any other way:
Arduino Outputs:
[Blind 1 OPEN] Pin 12 -> Relay Board 8 -> RF Remote 1 Open button
[Blind 1 STOP] Pin 11 -> Relay Board 7 -> RF Remote 1 Stop button
[Blind 1 CLOSE] Pin 10 -> Relay Board 6 -> RF Remote 1 Close button
[Blind 2 OPEN] Pin 9 -> Relay Board 5 -> RF Remote 2 Open button
[Blind 2 STOP] Pin 8 -> Relay Board 4 -> RF Remote 2 Stop button
[Blind 2 CLOSE] Pin 7 -> Relay Board 3 -> RF Remote 2 Close button
Arduino Inputs:
[LightwaveRF OPEN] Pin A2 -> Lightwave Relay
[LightwaveRF CLOSE] Pin A3 -> Lightwave Relay
Power:
Arduino 5V -> DC-DC In (+)
Arduino GND -> DC-DC In (-)
DC-DC Out (+) -> RF Remote (+) (for each remote)
DC-DC Out (-) -> RF Remote (-) (for each remote)
240v Live -> LightwaveRF live Input
240v Neutral -> Lightwave RF Neutral Input
7-12V power supply -> Arduino power port
Following is a wiring diagram depicting the above.

STEP 4
Program the Arduino. I have supplied the code I used on Github as a reference, and it should work with the above connections assuming the same hardware is used. Otherwise some minor tweaking may be required.
Things to note:
- When “pressing” the button with the relay board, a pulse is needed. I used 20ms which seemed to work well.
- If you have more than one blind, as in my case, I found that the RF signals interfered with each other, and so a delay was needed between commands. In my case, 500ms was enough.
- When opening the blinds, it takes slightly longer than closing them (presumably due to gravity working against the motor!), and so this needs to be taken into consideration in the code.
- I used the EEPROM on the Arduino to store the current state of the blinds in case of a power cut.
STEP 5
Link the LightwaveRF relay to your app (see instructions here), and test the system by sending the open/close/stop commands.
STEP 6
Enable the LightwaveRF skill to Alexa so that you can activate your blinds with voice commands!
You can also do some more cool stuff, like:
- Setting a mood like “Sleep” on the LightwaveRF app so that you can turn your lights off and close your blinds at the same time.
- Setting a recurring event so that your blinds can open at the same time as your alarm clock.