8th December 2015 by aegeuana_sjp_admin
An Introduction to Image Compression [PART 2]
Unfortunately, preparing images for the web can be a bit of a faff. There’s not really a perfect file format that will work for everything and cater for all your needs. There are certain file formats that are more suited for some types of images than others.
There are three handy questions you should ask yourself when preparing images for web:
– Does it need transparency?
– Does it need to be animated?
– Does it need to be high detail?
For example, for images with transparent areas you can’t use JPEG, but you can use PNG, GIF or TIFF. However, for high quality/high detail photography, JPEG is perfect. For animated images, you can only use GIF, and so on. You also have to take browser support into consideration (e.g. TIFF files won’t work on Mozilla Firefox).
Let’s focus on how the three most popular and widely supported image formats work. PNG supports transparency and lossless compression, but because it is lossless, the reduction in file size isn’t particularly good. GIF also supports transparency in addition to animations. This format has both lossy and lossless compression. The first limits the image to only 256 colours and the latter uses the LZW method.
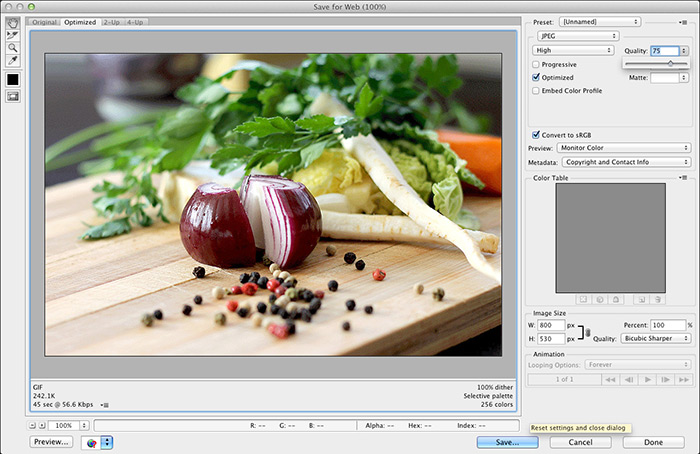
Lastly, we have JPEG. If you don’t need animation or transparency, this is the way to go as it provides a good balance between quality and compression. The great thing about JPEG is that you can adjust this as you see fit. For the most part it is a question of trial and error until you find the sweet spot of compression and quality. For most people and most situations, reducing the image quality down to 75% seems to work nicely, as this seems to generate the greatest reduction in file size without significant changes in image fidelity. Beyond this point, changes in image quality become apparent.
There are plenty of sites and applications that will compress your images for you, but sometimes it is better to do it yourself. Photoshop makes it pretty easy to do this yourself. If you go File > Save for Web you’ll have a window appear that will let you choose which file type you want and lets you play around with the settings as you see fit.

There are other solutions for image compression that are slowly emerging which show substantial promise, such as Google’s WebP. This is a brand new image format specially made for the web that uses both lossy and lossless compression. It seemingly combines the best of all three of the more popular image formats (GIF, PNG and JPEG), by being able to support transparency, animations and very impressive compression rates, all while maintaining good image quality. Google says WebP images are up to 25%-33% smaller in file size than JPEGs and 3x smaller than PNGs. However, being relatively new, there isn’t much browser support for it yet, so it remains to be seen whether or not this will take off.
Further reading and references:
[1] http://en.wikipedia.org/wiki/Image_compression
[2] http://www.creativebloq.com/design/designers-guide-image-compression-10121068
[3] http://www.html5rocks.com/en/tutorials/speed/img-compression/


