24th December 2015 by Pambos Palas
Strain Gauges [PART 2 – The Sensor]
The first part of this series covered the definition of strain, and provided a very basic description of the deformation that a member goes through under uniaxial tension/compression. This post will focus on how strain measurements can be taken exactly and how the strain gauge itself works – more specifically, the “bonded metallic strain gauge”.
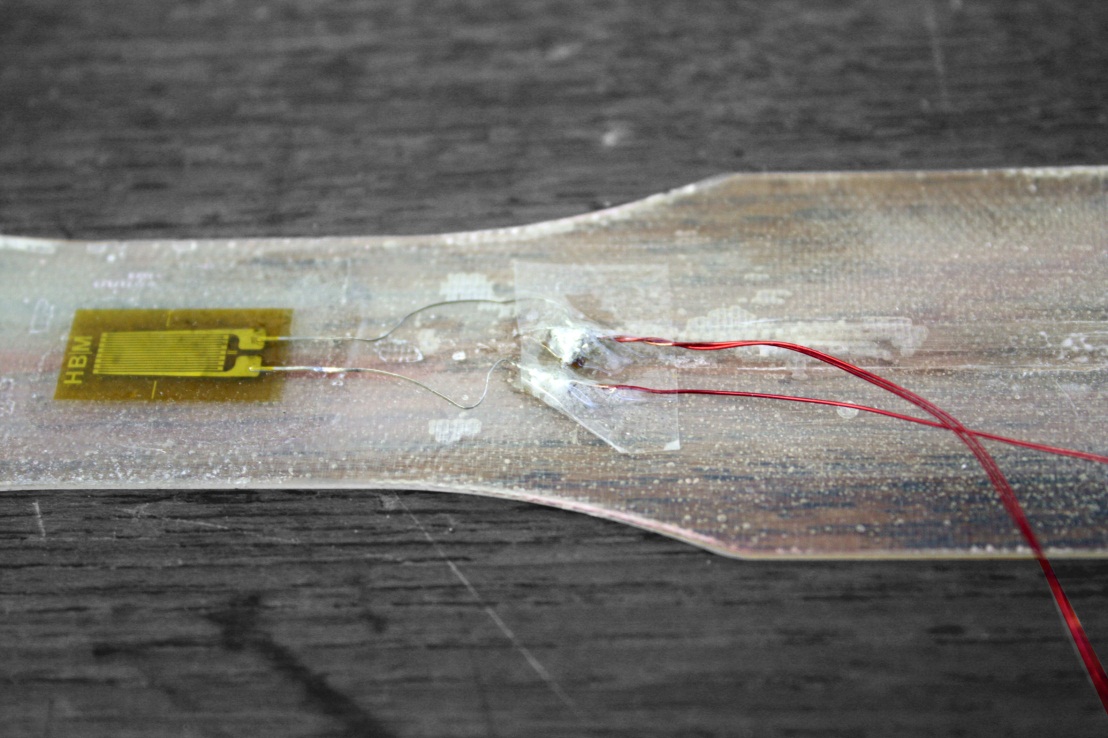
Figure 1 below shows an example of a strain gauge. It consists of very fine wire or metallic foil which is arranged in a pattern, and held by an insulated and flexible backing. Typically, strain gauges are very small (about the size of your fingernail) although they do vary in size. To understand more about the geometry, it’s important to understand the underlying principles. The strain gauge is bonded on to the member with a strong adhesive, ensuring that any strain that the member undergoes is also transferred to the gauge. As the thin foil wires are stretched, they too are affected by the Poisson phenomenon and they become thinner and longer (similarly if they are in compression they will become thicker and shorter). The effect of this is a proportional change of electrical resistance, as current can flow much more freely through a larger cross-section of wire than a smaller one. If we study the strain gauge in Figure 1 below, it is quite evident why it has such a particular geometry. The thin foil wires in the horizontal direction are the ones we are interested in measuring the resistance across – in fact, the whole stain gauge is essentially just one long wire (or resistor) that is arranged in such a way that it is sensitive to just one direction of strain. We can see that the thin parts of the wire are all in the horizontal direction, and any vertical parts of the wire have a significantly larger cross section – so much so that any change in strain in the transverse direction has a negligible effect on resistance compared to the direction that we are interested in.
It is evident that very strong bonding is required between the backing of the strain gauge and the member for accurate measurements. For short lifespans, a cyanoacrylic adhesive can often be used, however, for longer installations some sort of epoxy would probably be more appropriate. Additionally, the surface would need to be treated prior to installation, mainly degreased and sanded with fine sandpaper to smooth it out.
Gauge Factor
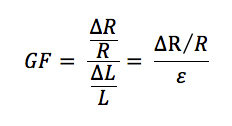
Strain gauges are available with many different nominal resistance values, although the most common are probably 120 Ohms. When mapping the change of resistance to the strain measured, a very important property of the strain gauge is used, known as the Gauge Factor (GF). This is a dimensionless property that basically describes the sensitivity to strain. It is defined as the ratio of the fractional change in resistance to strain:

For most metallic strain gauges, this value is usually 2, or something close to 2. This means, for example, that a strain of 200 microstrains on a gauge of 120 Ohms nominal resistance, would result in a change of resistance of (200 * 10^-6) * 2 * 120 = 0.048 Ohms. This is of course a tiny difference, which makes the task of measuring it quite difficult and prone to noise. The next section of this blog post will cover how these changes in resistance are generally measured in practise.


